How to Build a Farm Pond
Construction of a pond for your farm – step-by-step guide of how we did it.
Building a farm pond is among the most inexpensive pond constructions of them all since you in most cases don’t have the need for rubber lining or adding any other materials. With a few pitfalls. You need to have the right conditions when it comes to the soil, ground water level, water and winter conditions.
Note: This guide and examples is based on building farm ponds but can be also be of use if you are looking for constructing smaller earthen ponds in a backyard or a smaller patch of land.
What to think of before you start
So, you want to know how to build a pond for your farm? Hopefully we can assist in your train of thought with this combined guide and examples from our own earthen farm pond constructions.
In this guide we do not deal with any legal aspects of building a pond. Laws and regulations can be different depending on where you live and it's all up to you to contact the necessary authorities, seek out permissions et c.
Lets not hesitate, we will start with a few general conditions that needs to be fulfilled (or considered).
Soil conditions
The key component for a farm pond is the soil, or the right proportions of clay with a possibility for a smaller amount of silt to avoid costly constructions for sealing the bottom or walls later on.
If you test by baking a small ball of mud it should be able to hold its own integrity – instead of falling apart into a slush.
On the other hand, if you have pure clay layers (compressed) it can be a bit rough to excavate and clay can also be a problem when it comes to clarity in the water you add.
Ground water level
If you have a too high ground water level there is always the risk of underlying streaming, which in that case could in time wash away material and also makes excavating harder. You might end up with the need of pumping out ground water since your farm pond will have a hard time holding its wall and bottom integrity when you try to dig in a muddy slush.
Also, ground water can be a blessing if you hit a stream later in the construction (as in our case) since you will have a natural flow of water to your earthen pond.
Water Supply
Water for your farm pond can come from different sources, depending on how you plan and design. The more you can make use of natural water like rainwater finding its way to your pond or ground water the better.
Altering a natural flow from a river or stream are in most cases strictly forbidden.
Last, but not least, pumping water from a drilled water well can also be an option. Although costly if you need to drill a new well or spend money on electricity.
Winter
If you live in an area where it's winter conditions and risk of your farm pond freezing over – you need to have the data for how deep down the frost goes. If you dig your soil pond too shallow you will have to add other mechanics (aearation or streaming effects) to keep the pond from totally freezing over (thus killing both fish, crustaceans and plant life).
If you have ground frost conditions you need to make the pond approximately double the depth of the ground frost level.
Step-by-step: Construction of a Farm Pond
Prior to signing on for access of any piece of land (if you are to buy or lease it) or hiring an excavator it it is crucial to do certain tests. Before we decided to use the piece of land for our future small farm – we did the following:
- Overall topography and surroundings
- Geotechnical tests
- Ground water tests
After the wanted results and final placement of the ponds we continued with: - Excavation
- Bottom and wall design
- Filling with water
Note: In this guide we have added our own story (the sections with blue background) along with timestamps and images from the process.
1. Surroundings
When planning the placement of a farm pond (or ponds) there is much to take into account. What is the primary use – what type of pond are you building? How does the wildlife, flora and vegetation look like? Will you be emptying it or recirculating the water?
Some conditions to avoid (or investigate further) are areas with:
- Trees and large shrub/bushes
- Visual bedrock
- Wild animals (especially boars that can easily destroy the surroundings of a pond)
- Natural streams, brooks - which in most cases are forbidden to alter
- Nearby farm land where pesticides are used (if you plan on having fish or other animals in your pond)
July, 2021
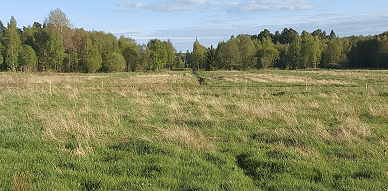
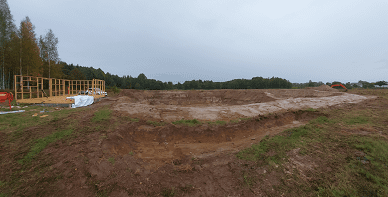
Picture of the untouched landscape prior to continuing with geotechnical tests.
The piece of land we started out with had seemingly perfect topography and placement for future ponds with a slight decline (roughly 1/2 inch per yard or 1.5 cm/meter) and an open landscape to the south. Several decades ago it was used as a grazing pasture and had been left untouched as a wild grass meadow.
The only caveat was that it showed signs of bedrock in the northern parts, which needed to be further investigated.
2. Geotechnics and Topography
It is of outmost importance that you gain knowledge of how the underlying soil, possible bedrock and topography can impact on the design and possibilities for your future earthen pond. Depending on the size you will need to either consult a geotechnician or contractor or do your own investigation. For our earthen ponds we made our own test since we have experience in soil and geotechnics.
Tools needed:
- Shovel and an earth drill
We only had the need for a 4 ft manual drill (1.20 meter) since the plan was to use the excavated soil as pond walls and barriers thanks to the sloping land. There are both manual and motorized earth drills with extensions up to several feet available for rent or to buy. - Tape-measure (long enough to measure the total width of the pond) or a laser distance meter for larger areas.
- Marking poles and string/tape for marking out the general area of the pond
July, 2021
We cannot stress enough how important it is to investigate with as many test holes as possible if your land show signs of underlying bedrock (as in the case with our ponds). The bedrock can suddenly jut up or make a deep dive and you will not know until you’ve did enough test drilling.
Also, you will notice pretty soon if the layers contain too much gravel, sand or boulder fitting for a farm pond. Hard clay can be tough to drill manually but you could change to a motorized one.
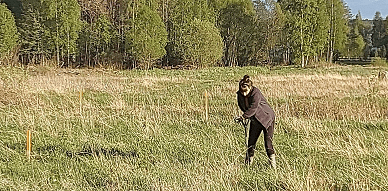
Anna doing manual drilling for testing the soil layers. It’s hard labor if you drill in harsh conditions (gravel, sand or hard clay or large quantities of rocks and boulders).
Our plot of land had the following conditions:
- Underlying bedrock ranging from 4-7 feet down (1.2 – 2 meters).
In our case we had a hunch about underlying bedrock but after test drilling we where able to cover enough area for our earthen ponds without any bedrock – at least we couldn’t find any at the desired depth we where aiming for. - Thin top soil layer (humus layer) of about 3 inches (10 cm). The deeper humus layer you have the more you need to remove. The humus layer is normally porous and does not hold the characeristics you would want as a soil or earthen pond wall or bottom layer.
IMPORTANT NOTE: When you drill test holes there will be deep holes with steep walls left. Small wildlife such as amphibians, snakes and insects is at risk of falling into these small pits – unable to get up.
In just a day we found several baby forest lizards (as shown in the picture), frogs, a copper snake and grass hoppers et c which we rescued. Thus, make sure to fill up the holes as soon as possible (and check for animals before you do).
2. Groundwater
Ground water can be tricky but also quite easy to where it is located. The ground water level can in most cases be tested during your geotechnical tests (drilling). Here are some results, wanted and unwanted, that you could end up with:
Artesian aquifer
Fine or hard clay sediments can act as a seal for underlying positive water pressure. This phenomena is called artesian aquifer.
If you penetrate the clay and water starts streaming you are best of to wait and see how far it continues in the drilled hole. Positive water pressure can vary greatly from spot to spot but once it sets you will know how far up it goes. Artesian aquifer is in most cases a no-go when it comes to building an earthen pond as you are most likely without chance to pump out the massive quantities of water the earth can hold.
The never-ending layer of clay
If you drill through a clean layer of clay that seems to continue forever, or atleast to the wanted depth of your pond, is a positive result. Just keep in mind that just a few yards away the conditions can change – again, test drill away.
The perfect conditions?
Ground water further down can also be positive to bump into, since you will have a natural intake of fresh and in most cases extremely clean water for your future pond. Taken you find it just below the bottom of your pond depth. Moist gravel or sand or even wet bedrock is a good indication.
Again, if you encounter ground water further down, be aware that high streams can quickly fill up a hole that has just been dug up. Wait a day or two and come back to the same hole and check again – if there is no indication of high pressure streams (water filled hole or muddy clay) you are most likely safe. In other conditions you might want to plan ahead with ground water pumps as a back-up during excavation of your earthen pond.
July, 2021
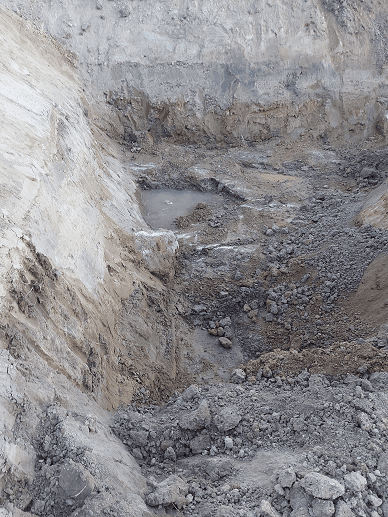
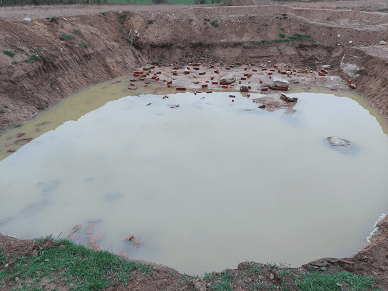
For our second farm pond it started with a small indication of ground water. In a few days it had risen to a few feet of water depth. Note: The picture is from August (1 month later).
During our tests we found both wet bedrock along with layers of moist sand and gravel at about 4 feet (1.2 meters) down.
In the middle of Sweden the ground frost can reach up to 4 feet (1.2 meter) so we planned on a pond depth of 8 feet (~2.5 meters) by raising the walls.
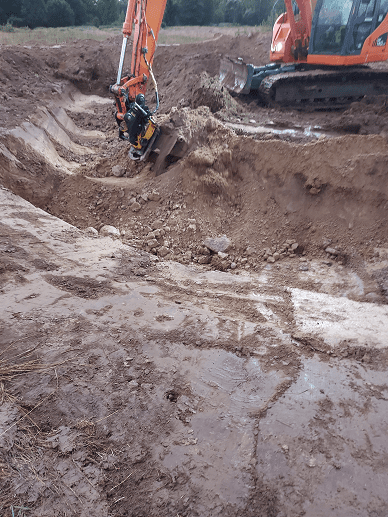
Thus we planned for a possible need for pumping out ground water. Luckily we never had any need for it. While finishing the second farm pond the excavator hit a deep pocket just above the bedrock and ground water started, slowly, pouring out.
We had enough time to finish the design before the pond later started to fill itself up. Yay, free water!
We did our tests during july (summer of 2021 which was extremely hot and almost no rain) and started excavating in august – before the fall, which usually means more rain.
Please note that the ground water level can vary with several feet depending on the season. You are best to start digging an earthen pond in a nearby future after doing your tests. And keep track of the weather conditions in between. In most cases it will take a few weeks of rainfall to make an impact on the ground water levels. But, if you wait too long you might end up needing to do another test run.
4. Excavation
Excavating an earthen pond sounds like the easiest part. But, you will need to plan for things like what machines are suitable, what is the working area and what to do with the excess of soil? If not, you could end up with high costs and a surrounding area which could take years to repair.
Machines
Maybe you have your own excavator or machine (and not planning to upgrade or downgrade) or the nearest rental station or contractor only has a certain range or size of machines.
However, if you’re free to choose you will need to consider what the correct excavator (or machine) is for your earthen pond and the surrounding land. By correct we mean something which isn’t too small or too big.
Small machines (up to 10 tons)
More agile and easier to move around and won't ruin the surrounding land so easily. Time consuming and there aren't as many extras to them (drills or special buckets).
Large machines (+10 tons)
Faster to work with and can reach deeper plus you can add extra tools or special buckets. Usually needs an experienced driver and a plan for where to place them and a path (exit and entrance).
Excess materials
When digging an earthen pond it will produce around 10-15% more cubic metres of soil when you bring it to the surface than what it was when being left untouched in the ground. This is due to the loosening of the soil particles and creating pockets of air. You could say that you’re un-compacting it.
With that in mind, you need to have a plan for:
- The humus layer (top soil)
One idea is to separate it by ”shaving” it off for future use as soil for bank or wall vegetation. - Stones and boulders
Separate them and place them back in the pond is one solution. - The rest of the soil
Use it to raise the walls of the earthen pond or spread it out to level the surrounding area.
August, 2021
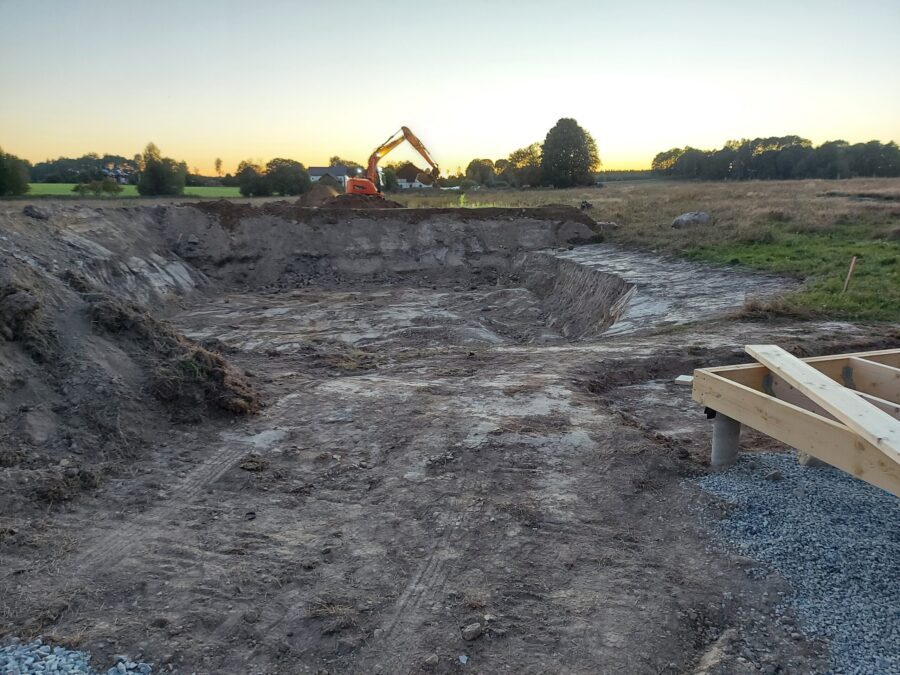
The excavator working from the middle (and later on moving away in one direction to avoid tearing up the meadow).
In our case we contracted a company, through a friend, to do the digging. They had several larger machines and we settled for a 20 ton with caterpillar treads and different sizes of buckets.
The job for digging out one semi-circular earthen pond with a size of approximately 2,000 square feet/200 square meters took roughly 16 hours.
We had the luxury of having an adjacent gravel road so the machine never needed to drive across the meadow or any other surface, as it could easily create a path from the road.
We separated both top layer and boulders and stones. All that larger material we ended up putting back into the pond at the end.
Thanks to the design of having raised walls and an embankment we were able to use almost all excess material for that design.
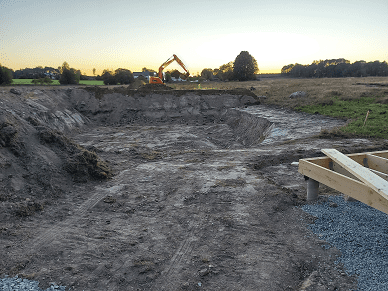
The first pond with its raised walls almost finished. Later on we used more of the excess soil to build an embankment. You can also see the bottom joists of our first cottage (right).
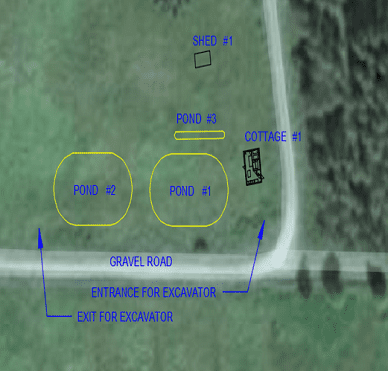
AutoCAD drawing showing the plot of land and part of our planning and design with exit and entrance for the excavator.
5. Bottom and wall design
Bottom and wall design in an earthen pond is the final step before adding water. Now is the time to:
- Add material to whatever floor you want
It could be gravel, sand or larger boulders or pillars for future constructions (like a pond deck or bridge). - Finalize all slopes and walls
A prefered slope for the walls below water for an earthen pond is somewhere around the ratio of 1:2, meaning that one yard/meter height = 2 yards/meters in width. Everything above water can be pretty much designed as you like as long as it can hold its own integrity. - Add or spread out top layer soil
If you plan to grow grass or other vegetation above the waterline, on slopes or embankments et c.
But, what if you hit bedrock in the bottom, don’t you need to seal that?
Usually not. Remember how we talked about wanting enough clay or silt particles in the soil during geotechnical tests?
Once you add water the outer layer of the soil will first dissolve and then replace itself – filling cavities and porous areas. Enough clay = Sealed bottom and walls. That’s part of the magic and ingenuity with having an earthen pond.
And do not fret. If you start adding water and it disappears into the ground you will always have a new chance (when emptied) to fix the leak.
September - October, 2021
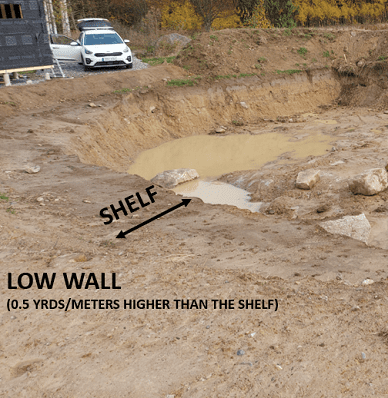
A late addition with a shelf to our earthen ponds, which was not planned from the start but will serve as a space for installments and future decking.
Once we where finished with the excavation and had about half of the walls done we decided to create a shelf by moving the northern wall about 3 yards/meters. By such we created an area we could place future aeration pumps and also enough space to build a deck which connects to the cottage.
As we plan on having a small farm for breeding crayfish we also added hiding places and burrows (see picture below).
Other than that, the final design for us was more or less about spreading out top layer soil onto the slopes.
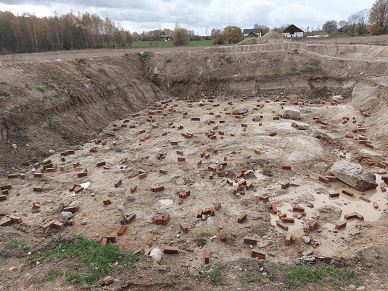
Here we see the final the design with the embankment and raised walls. The guy driving the excavator was superb at leveling and planning out the soil and the results was beautiful.
By placing excess boulders along with hollowed out clay bricks (with holes) we created burrows and habitats for our future crayfish (and hopefully thrive).
6. Filling your pond with water
The final step when building an earthen pond is to add water – and follow up how everything reacts once you do.
If you have natural ground water seeping in you need to keep track if the bottom and walls will hold the water – or if you have any leaking point that needs to be sealed (preferably with more clay).
The same goes for when you’re filling from another source. The key word is slow. Water is precious in most parts of the world.
October-November, 2021
In the first farm pond we struck bedrock, about 50% of the bottom is made up of granite bedrock with no ground water.
However, the surrounding clay quickly settled after excavation and now works as clogging layer. In combination with the ”body” of water (an outgoing pressurized force) the excavated pit will now forever be holding water – unless it grows shut with vegetation or dries up due to climate changes…
Both ponds have the clogging layer of clay. Smaller rocks and streaks of sand and pebbles are wasn't any problem since the clay first dissolved when wet and then replaced itself – filling cavities and porous areas.
By such we had no need of adding clay to the bottom or any of the walls. So once more, enough clay = sealed pond bottom and walls.
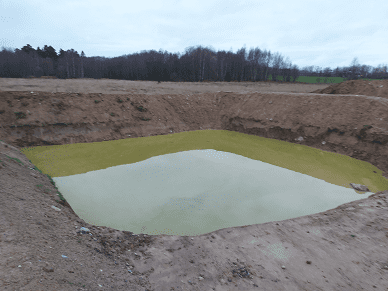
Fall weather with rain (below average for a Swedish fall) have started to fill the first earthen pond. Even though the bottom have streaks of bedrock it still manages to hold water.
Earthen pond number two, in which ground water started leaking in. Just a few feet more and it will be at the wanted level (with probable need to top it up during summer).
Looking at the images of the green-brownish water there are still ways to go. One big problem, which many faces, is how to clean a pond with murky or mucky water.
Not long after we finished winter made its entry. Both the earthen ponds still holds water and we will update on the progress later on.

